In this article, we will list down the steps to include required jars into classpath in Eclipse IDE
1. Steps to include jars in classpath in Eclipse IDE:
Step 1: Right-click on the project
Right-click on the project for which we want to include jars
Right-click –> Build Path –> Configure Build Path

Step 2: Libraries dialog box opens up with already included jars
Click External JARs…..

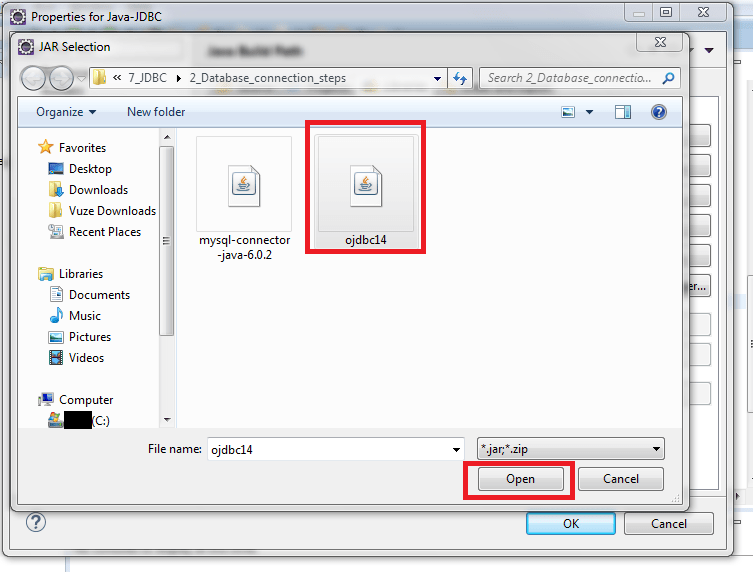
Step 3: JAR Selection dialog box opens up
Select the required jars –> click Open
Step 4: Finally click Ok
As we can see, ojdbc14 is included in the list at 2nd position
Note: This position can be changed and this doesn’t affects the project

Finally required jar is included into classpath in Eclipse IDE

2. Useful Eclipse IDE shortcuts :
- How to show line numbers in Eclipse IDE
- How to GO TO any line number directly in Eclipse IDE
- How to remove unused imports in Eclipse IDE
- How to clean project in Eclipse IDE
- How to build Java project in Eclipse IDE automatically
- How to generate constructor using fields in Eclipse IDE
- How to generate getters and setters in Eclipse IDE
- How to search files in Eclipse IDE
- How to locate methods in Java file in Eclipse IDE
- How to open editor using CTRL + E in Eclipse IDE
- How to search files in Eclipse IDE
Happy Coding !!
Happy Learning !!